Every image should help explain the page
An image should help you recognize a game element or follow a specific instruction. This collection contains official promotional material, badge and game-pass artwork, and selected frames from credited gameplay recordings.
Archived promotional views show the game’s earlier appearance. The CHALLS frame explains a retained code-result message. Frames from Random Roblox Games R US show the opening aiming tutorial, a level 1.1 result, and Sentry and Howitzer upgrade panels. Each frame is linked to its original video timestamp and discussed beside the relevant observation.
These are third-party recordings, not footage from an independent wiki playtest. The complete videos remain at their creators’ sources. Gameplay captures published by GAMES.GG and Destructoid are linked at their original publishers. The Codes card uses a text summary.
If an image cannot load
If an image cannot load, its slot shows an unavailable message and links to the source. No generated artwork is substituted.
Image attribution and rights
Game names and artwork remain the property of their respective rights holders. Official artwork is used to identify the game, achievements or listings discussed in the wiki; it is not offered as a reusable asset library.
Source attribution records origin, not a license grant or official endorsement. This independent site does not claim ownership of game art.
If we have missed a credit or you have a concern about material shown here, please get in touch. Include the image, its wiki page and the original source so the maintainer can identify the work and review your request.
How this site loads images
Images load from this site’s domain. The original CDN addresses and source pages are retained in the image records for attribution and reference.
More context
Game images and video frames
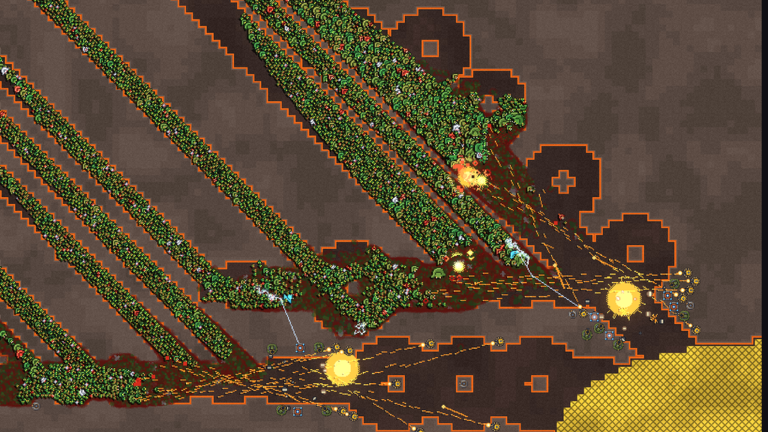
Overhead battlefield — official archive
Horizon Studios / Roblox CDN
Official Horde Defenders promotional image of an overhead battlefield and converging enemy waves
Original source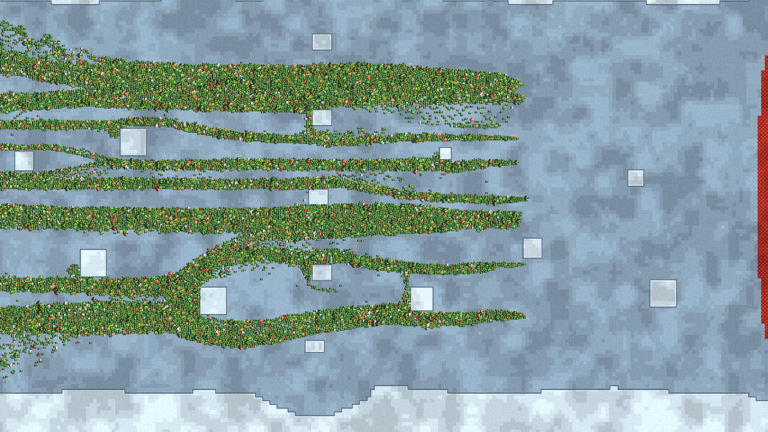
Pale terrain and enemy routes — official archive
Horizon Studios / Roblox CDN
Official Horde Defenders promotional image showing streams of enemies crossing pale terrain
Original source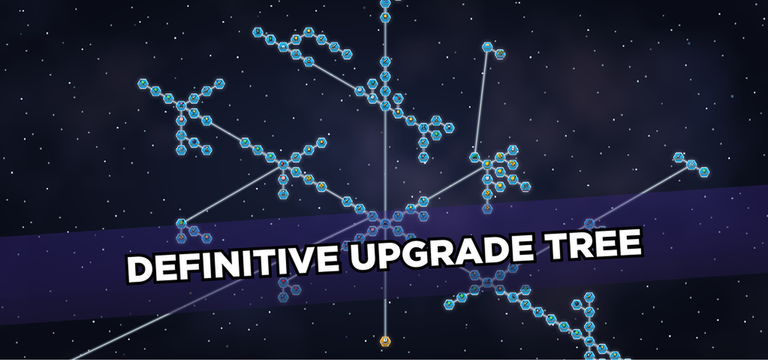
Upgrade-tree promotional image
Horizon Studios / Roblox CDN
Official Horde Defenders promotional illustration of the upgrade tree; the live game may differ
Original source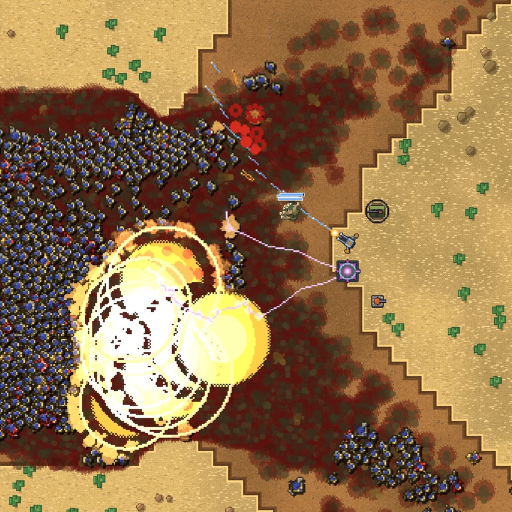
Desert battle — official game icon
Horizon Studios / Roblox
Official Horde Defenders game icon showing towers firing into enemy waves on desert terrain
Original source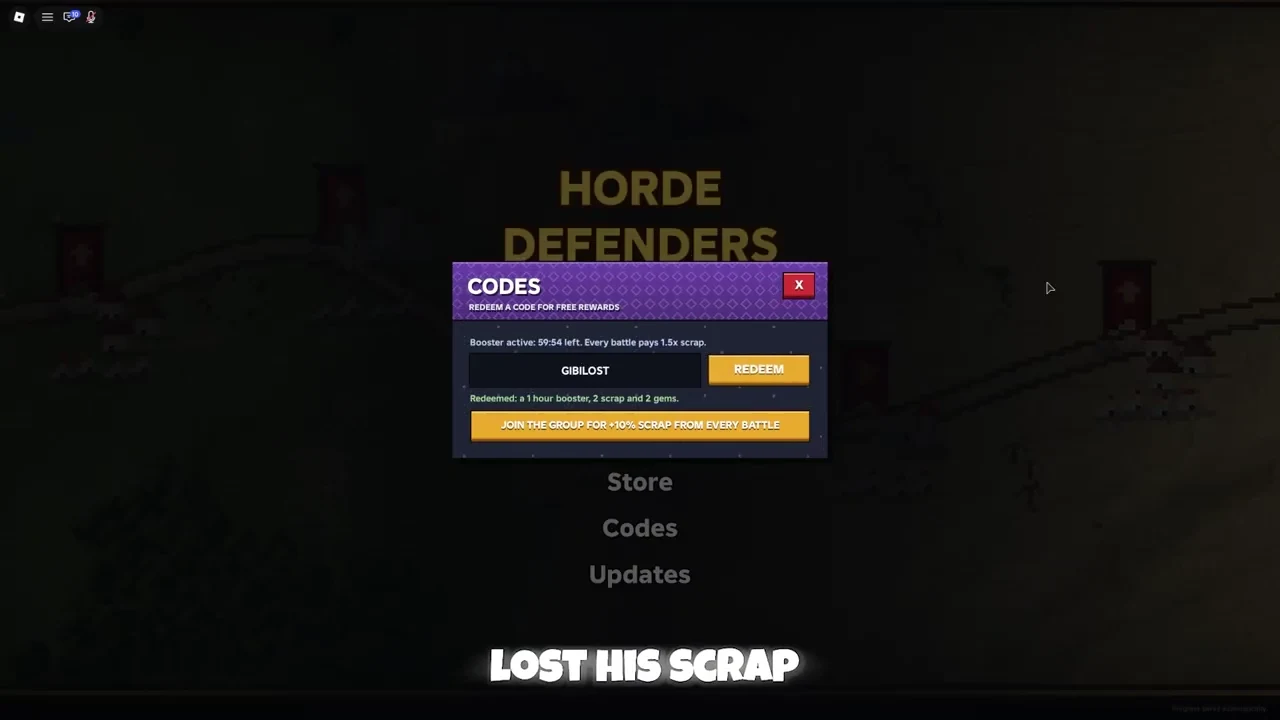
A changed input with the previous result still visible — 1:55
Video by CHALLS; game by Horizon Studios / Roblox
Frame from CHALLS’s recording at 1:55. The input has begun changing to the next code; the message below still describes BIGCODE. Used to explain why the Codes guide compares submission sequences. The recording was published September 30, 2026 (UTC). It is not this wiki’s playtest.
Original source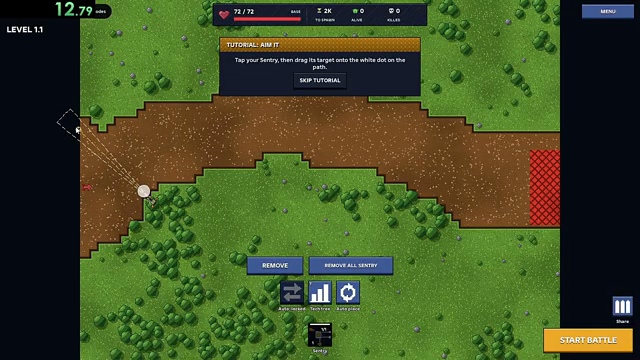
Sentry target adjustment in the opening tutorial
Video by Random Roblox Games R US; game by Horizon Studios / Roblox
This frame illustrates the difference between placing a Sentry and moving its aim point. The adjustment is still in progress. Source video published September 28, 2026 (UTC); reviewed October 3. This is third-party recorded evidence, not a wiki playtest.
Original source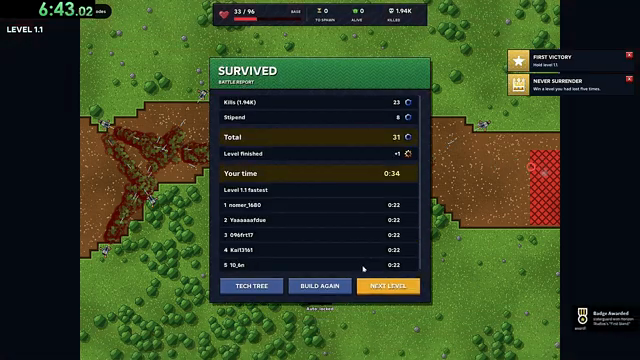
Level 1.1 survival report with Next Level available
Video by Random Roblox Games R US; game by Horizon Studios / Roblox
Used to distinguish an ordinary clear from the later flawless result. The battle time of 0:34 is not the duration of all retries. Source video published September 28, 2026 (UTC); reviewed October 3. This is third-party recorded evidence, not a wiki playtest.
Original source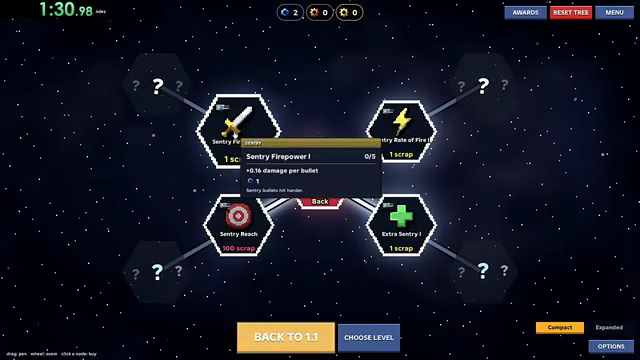
Sentry Firepower I before the first purchase
Video by Random Roblox Games R US; game by Horizon Studios / Roblox
The first Firepower purchase is shown alongside the surrounding Sentry branches. Values belong to this dated recording. Source video published September 28, 2026 (UTC); reviewed October 3. This is third-party recorded evidence, not a wiki playtest.
Original source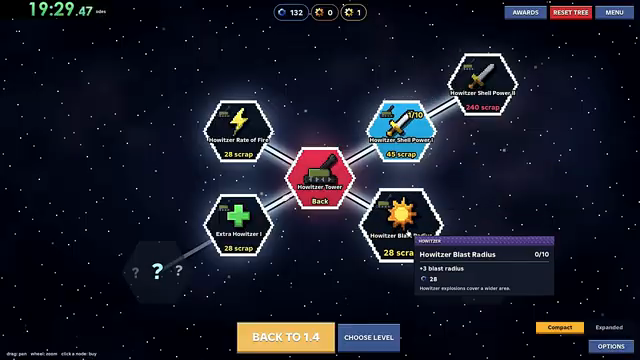
Howitzer Blast Radius before the first purchase
Video by Random Roblox Games R US; game by Horizon Studios / Roblox
This panel distinguishes a radius increase from the separate blast-damage branch. The game does not label a distance unit in this tooltip. Source video published September 28, 2026 (UTC); reviewed October 3. This is third-party recorded evidence, not a wiki playtest.
Original source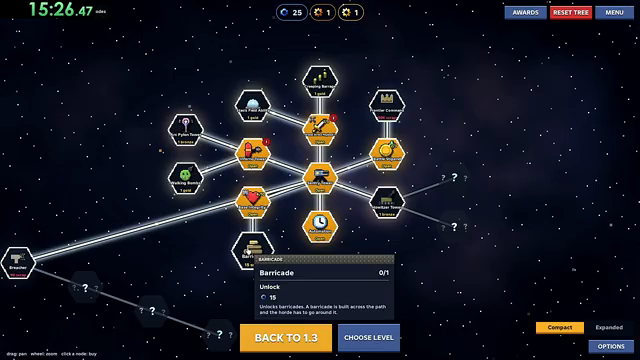
Barricade unlock tooltip describing a route around the defense
Video by Random Roblox Games R US; game by Horizon Studios / Roblox
Unaltered frame from a video published September 28, 2026 (UTC); reviewed October 5. The tooltip describes the intended Barricade effect. This frame does not demonstrate enemy pathing, placement restrictions or current-build costs, and is not a wiki playtest.
Original source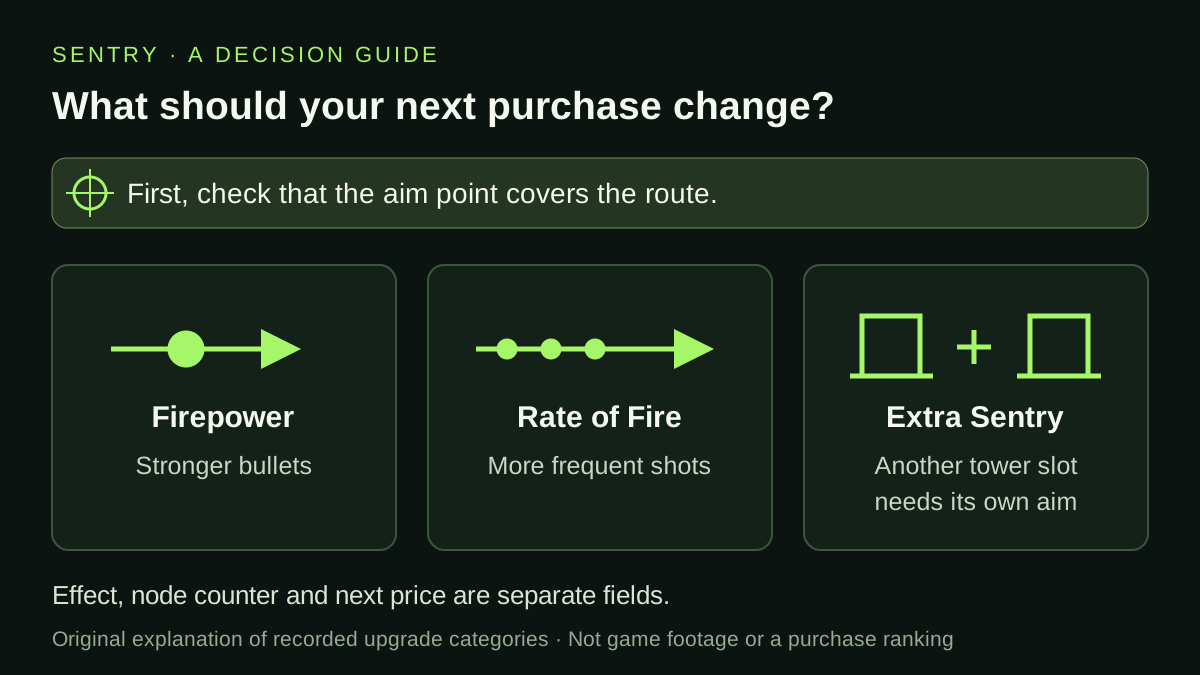
Three Sentry upgrade decisions
Horde Defenders Wiki
Original diagram based on the Sentry node descriptions in the September 28 recording. The icons illustrate distinct effects, not actual game statistics, a recommended order or a game screenshot.
Original source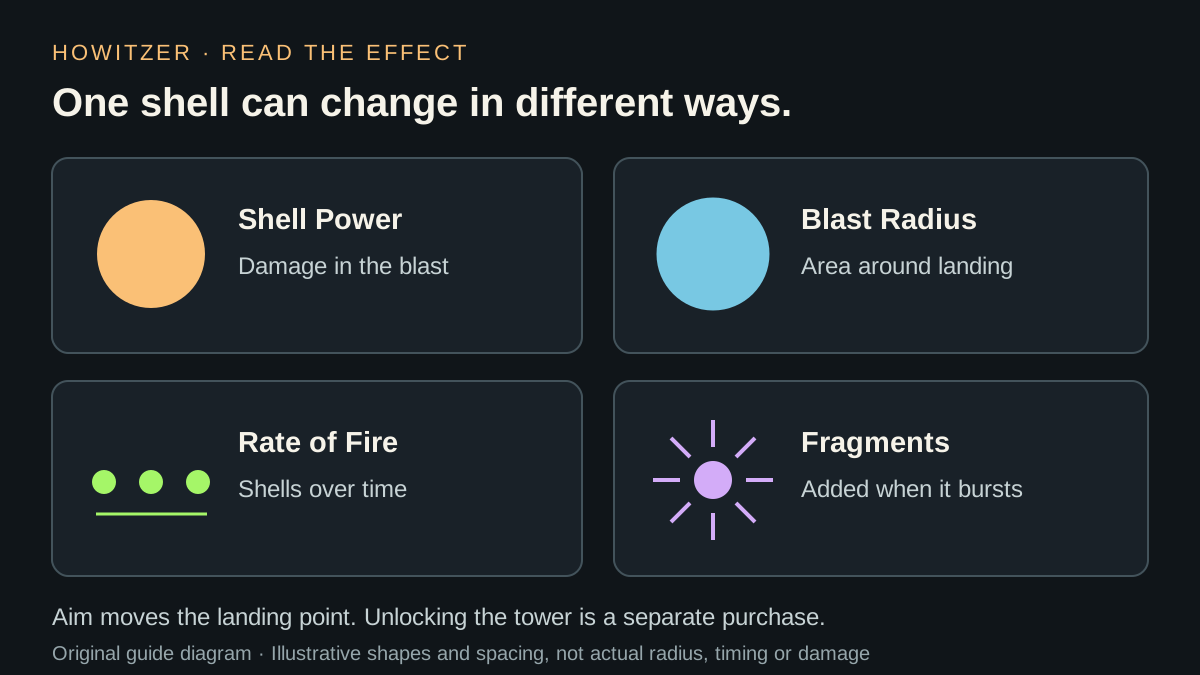
Howitzer shell effects compared
Horde Defenders Wiki
Original schematic of the Howitzer upgrade categories shown in the September 28 recording. Circle sizes and spacing are illustrative and do not represent actual radius, timing or damage.
Original source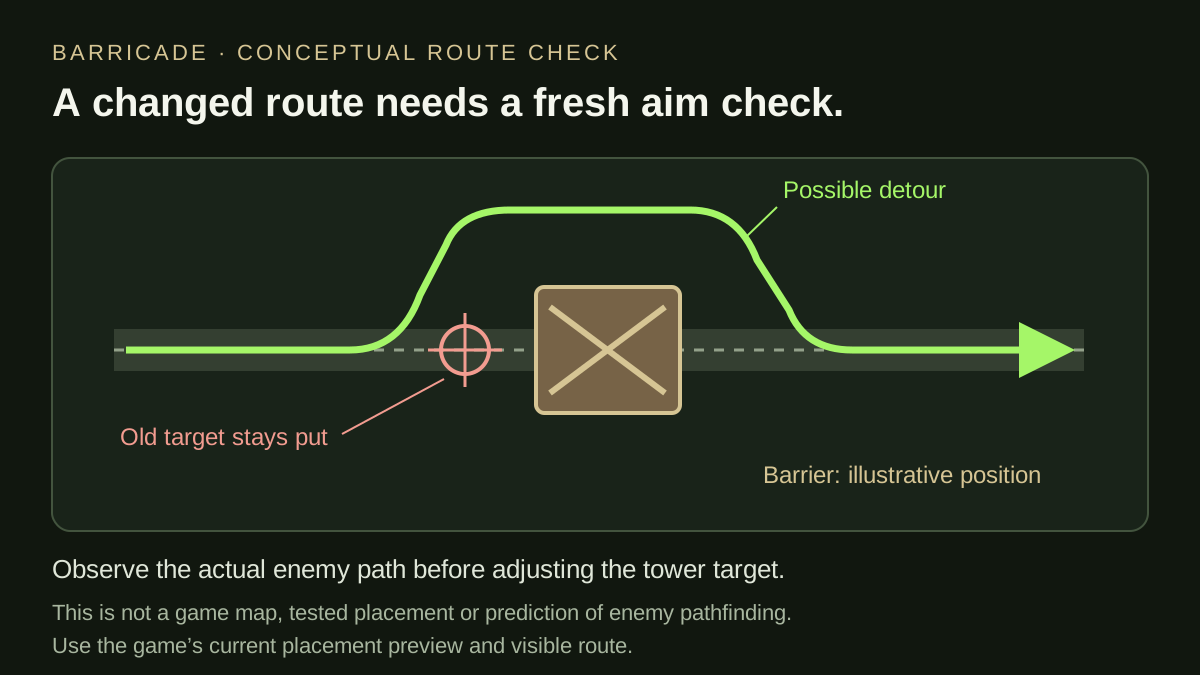
A detour and an unchanged aim point
Horde Defenders Wiki
Original diagram explaining a possible detour and why tower aim needs a separate check. It is not a real map, a tested placement or a prediction of Horde Defenders pathfinding.
Original source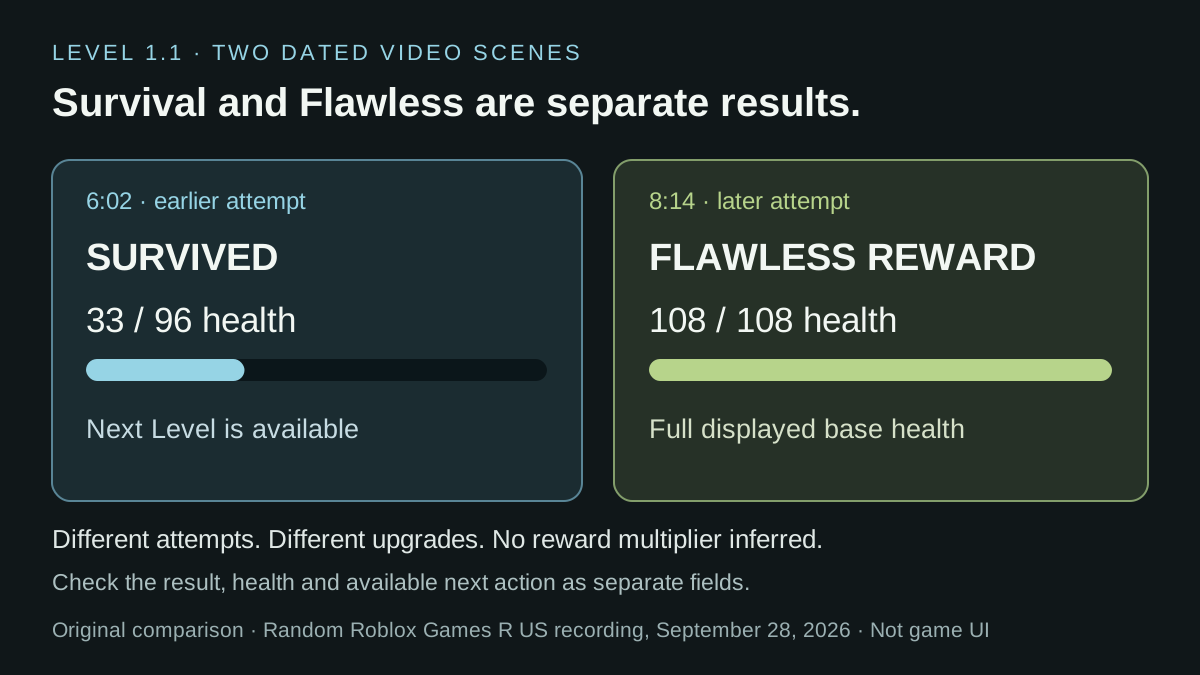
Two different recorded battle results
Horde Defenders Wiki
Original comparison diagram transcribing selected visible result fields from the September 28 creator recording. These are different attempts with different upgrades, not live tests or a controlled reward comparison.
Original source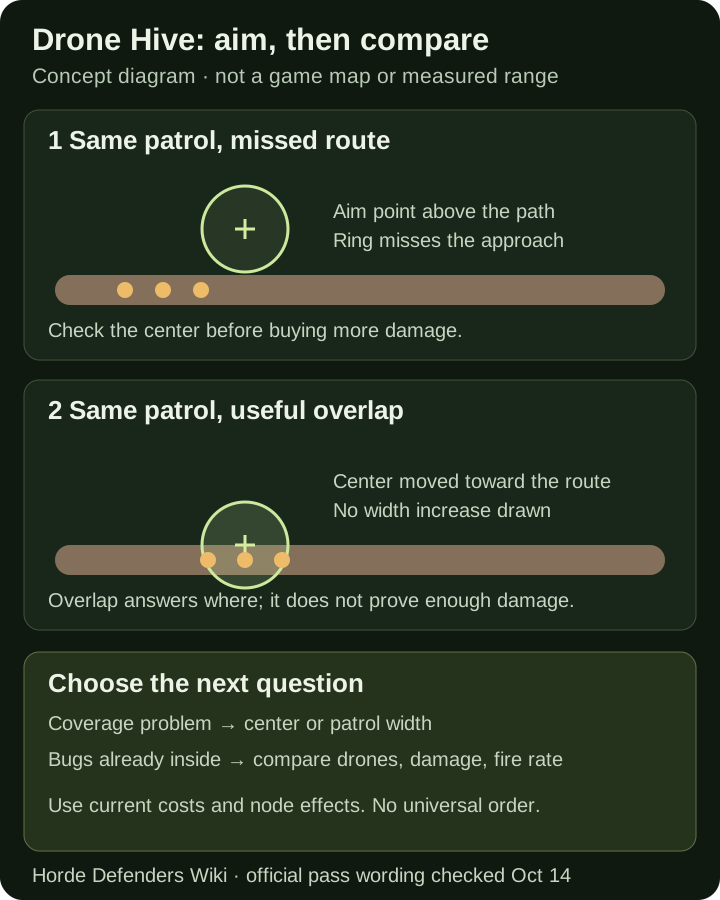
Drone Hive patrol coverage versus upgrade output
Original explanatory diagram by Horde Defenders Wiki
Original diagram illustrating the cited official description. It is not a game screenshot, measured map, independent playtest or proof of feature delivery.
Original source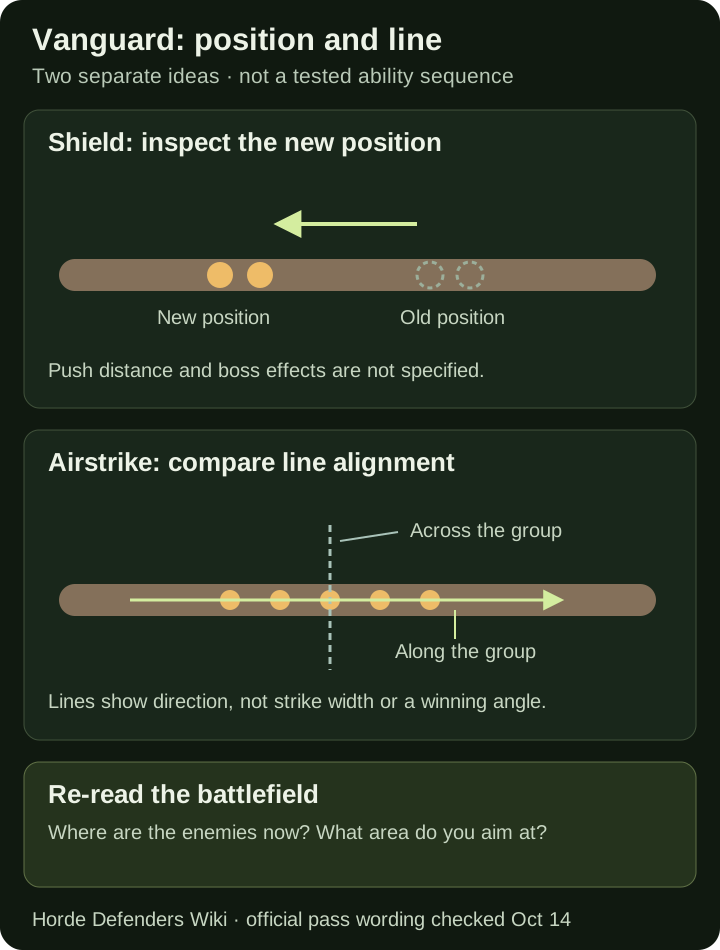
Vanguard displacement and airstrike line alignment
Original explanatory diagram by Horde Defenders Wiki
Original diagram illustrating the cited official description. It is not a game screenshot, measured map, independent playtest or proof of feature delivery.
Original source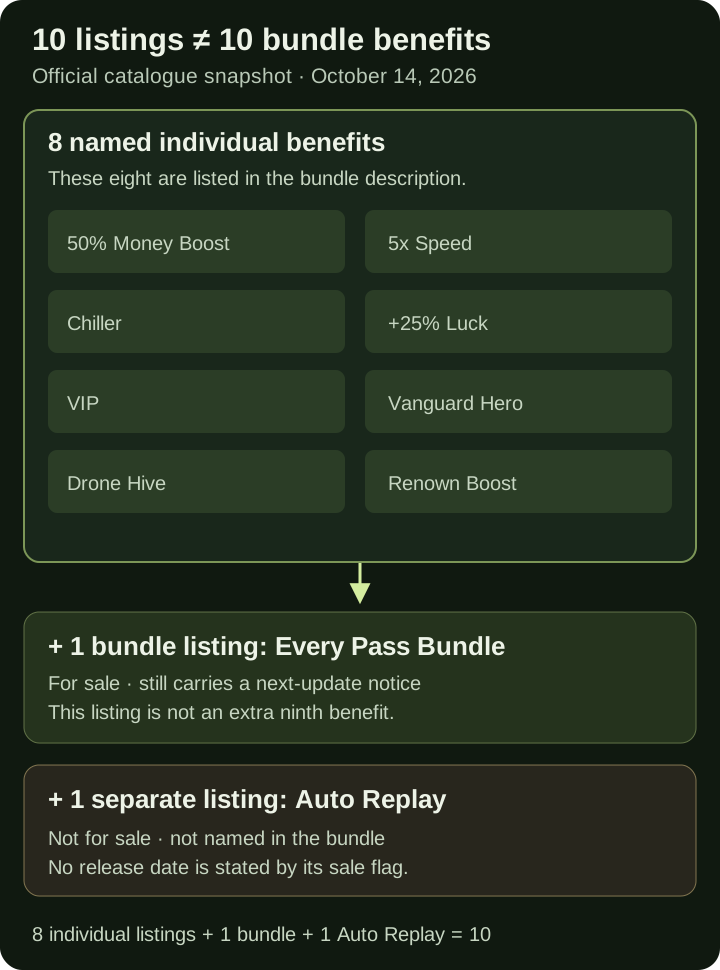
Ten pass listings and eight named bundle benefits
Original explanatory diagram by Horde Defenders Wiki
Original diagram illustrating the cited official description. It is not a game screenshot, measured map, independent playtest or proof of feature delivery.
Original source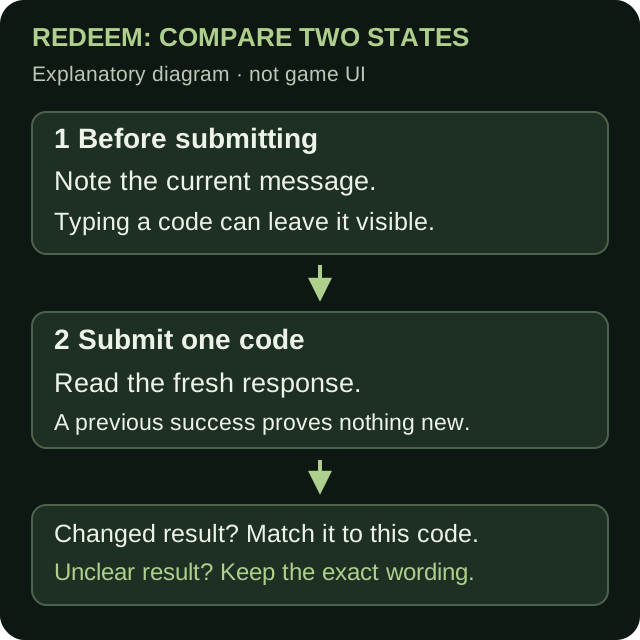
Compare messages before and after code submission
Horde Defenders Wiki
Avoid pairing a newly typed code with an earlier success message. The diagram is editorial and conceptual, not a game screenshot or a playtest.
Original source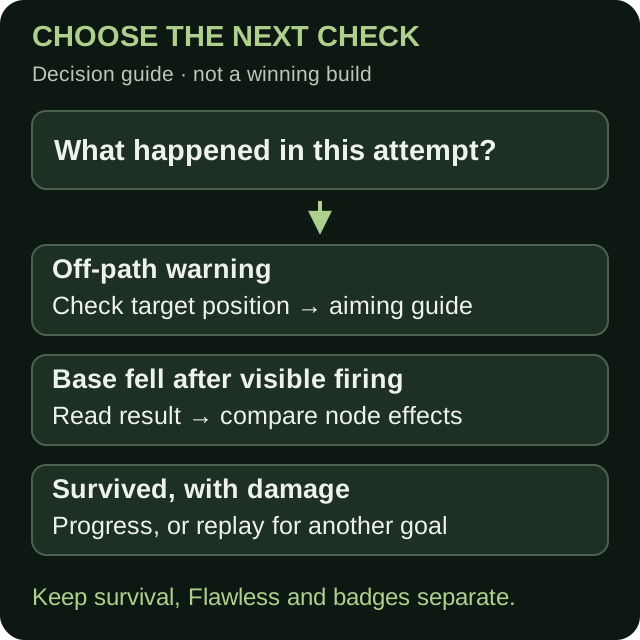
Choose the next check after an attempt
Horde Defenders Wiki
Use the visible outcome to choose the next guide. The diagram is editorial and conceptual, not a game screenshot or a playtest.
Original source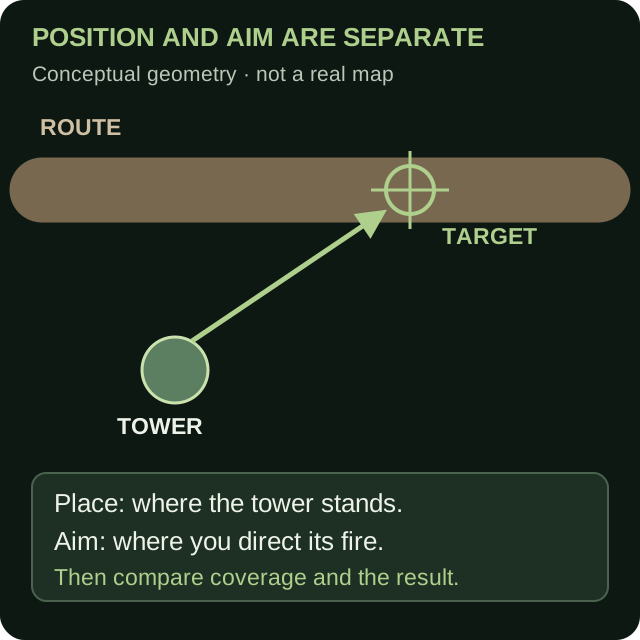
Tower position and target position are separate
Horde Defenders Wiki
Separate the tower position, route and target before adjusting aim. The diagram is editorial and conceptual, not a game screenshot or a playtest.
Original source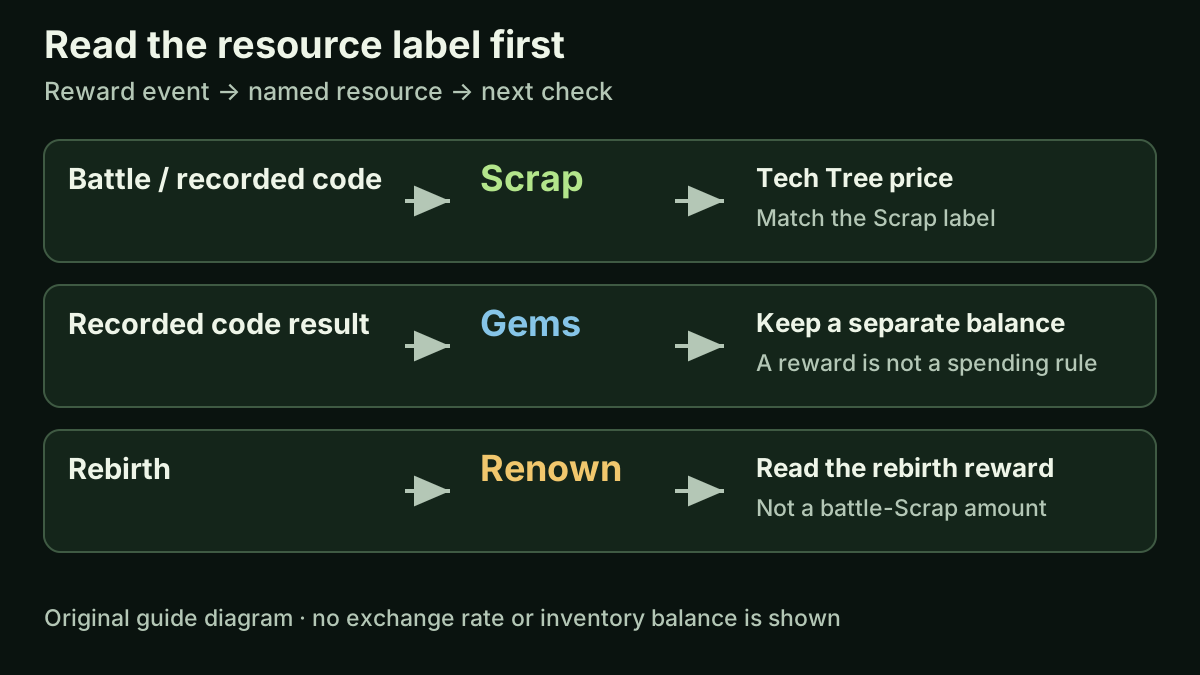
Three reward labels, three separate checks
Horde Defenders Wiki
Original resource flow diagram using dated code observations and official reward descriptions; not a game interface or exchange-rate chart.
Original source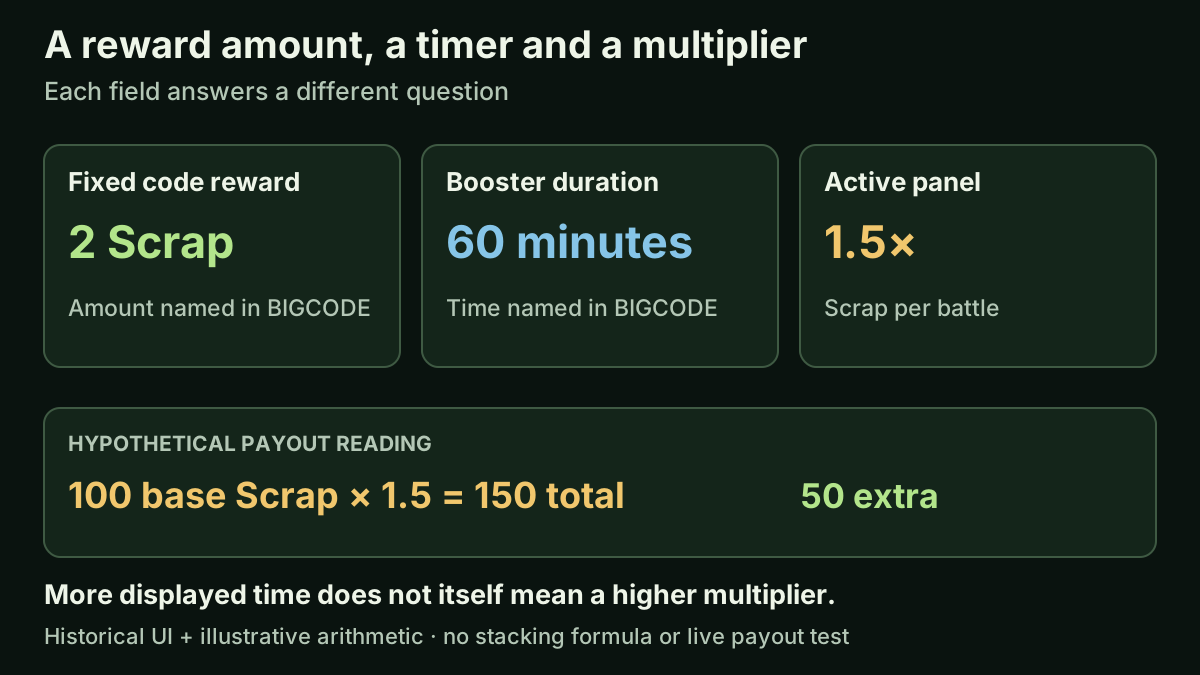
Separate booster duration from the Scrap multiplier
Horde Defenders Wiki
Original comparison of historical reward and booster labels plus a hypothetical arithmetic example. It does not establish bonus stacking or a measured battle payout.
Original source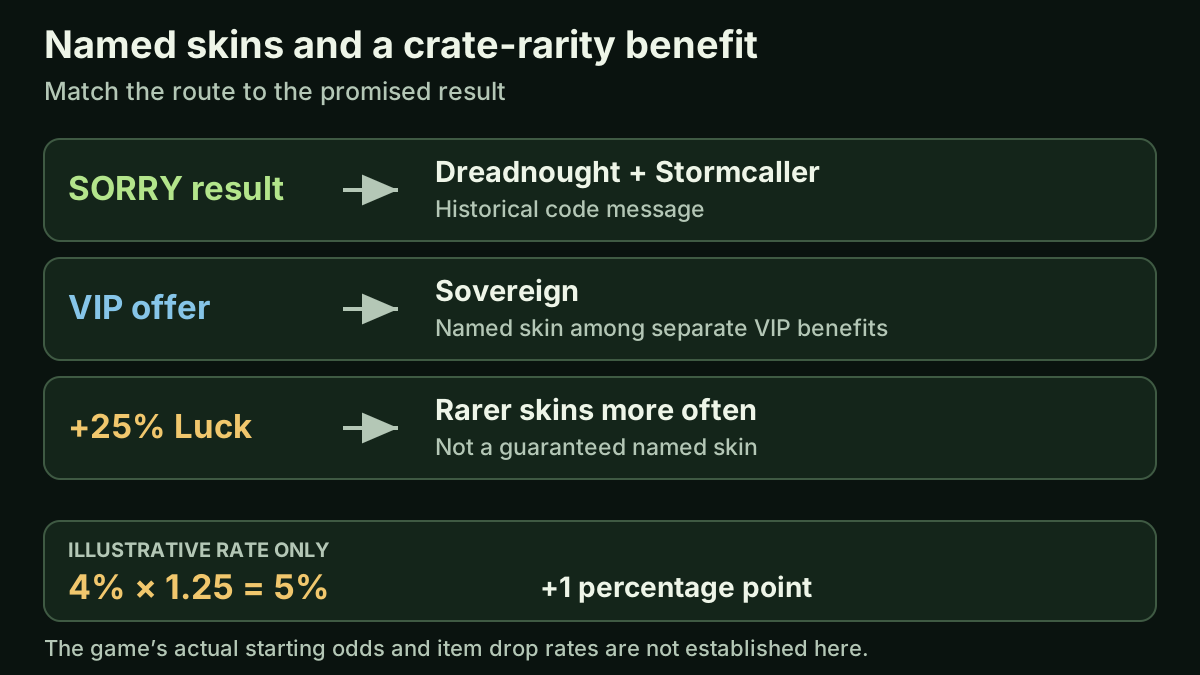
Three skin-related routes and a relative-percentage example
Horde Defenders Wiki
Original comparison of dated code and official pass descriptions, with invented percentage arithmetic clearly labelled. It is not a skin catalogue, game screenshot or actual drop table.
Original source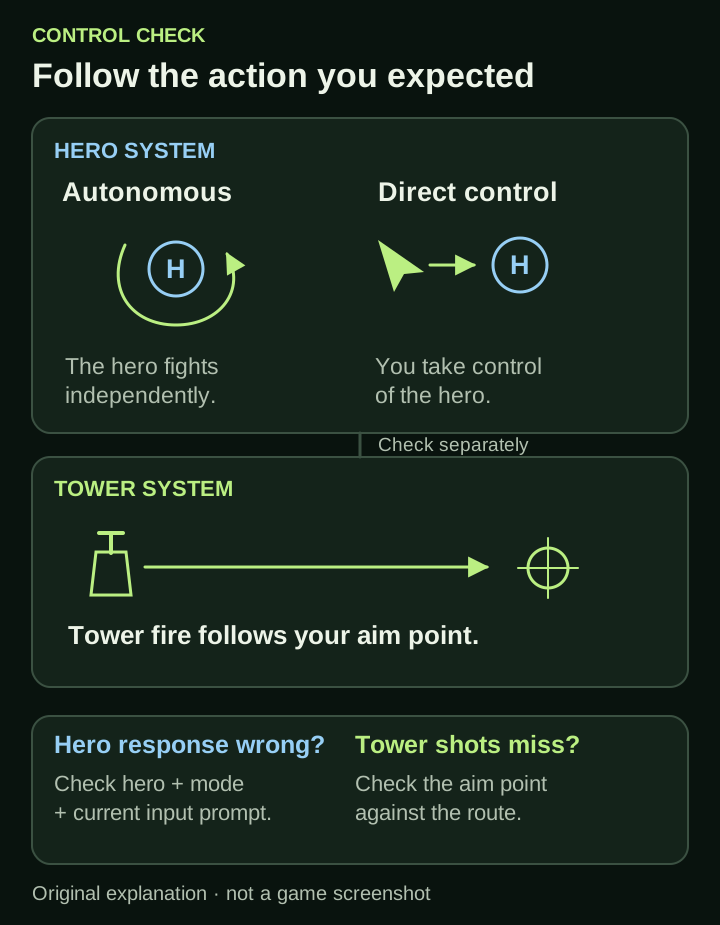
Hero controls and tower aiming: separate checks
Original explanatory diagram by Horde Defenders Wiki
Original visual explanation of the accompanying guide. Illustrative choices and symbols are not game captures, measured maps or independently tested runs.
Original source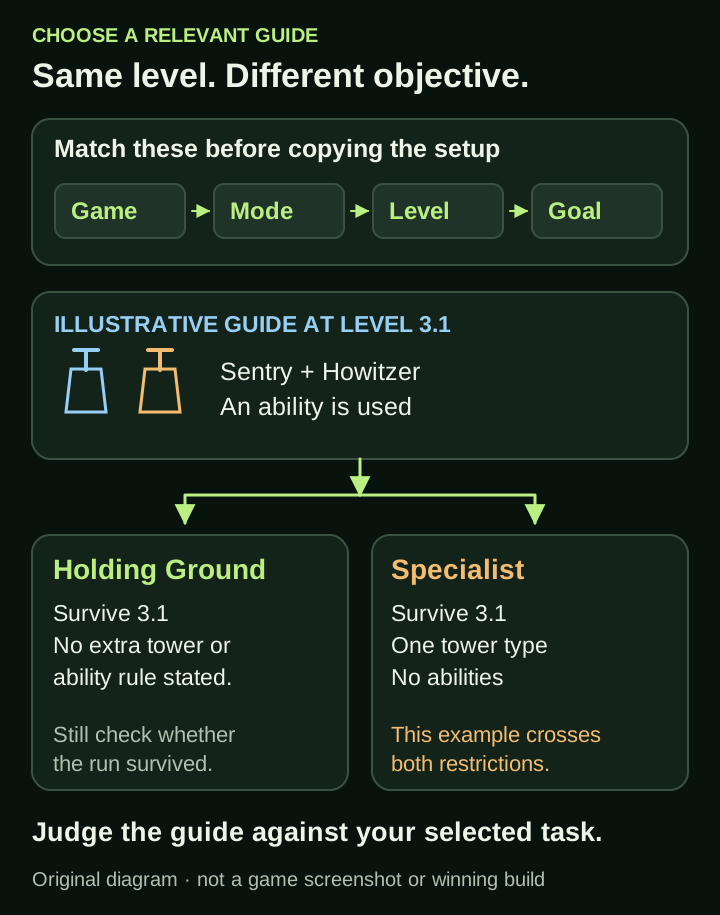
Match a level guide to your chosen objective
Original explanatory diagram by Horde Defenders Wiki
Original visual explanation of the accompanying guide. Illustrative choices and symbols are not game captures, measured maps or independently tested runs.
Original source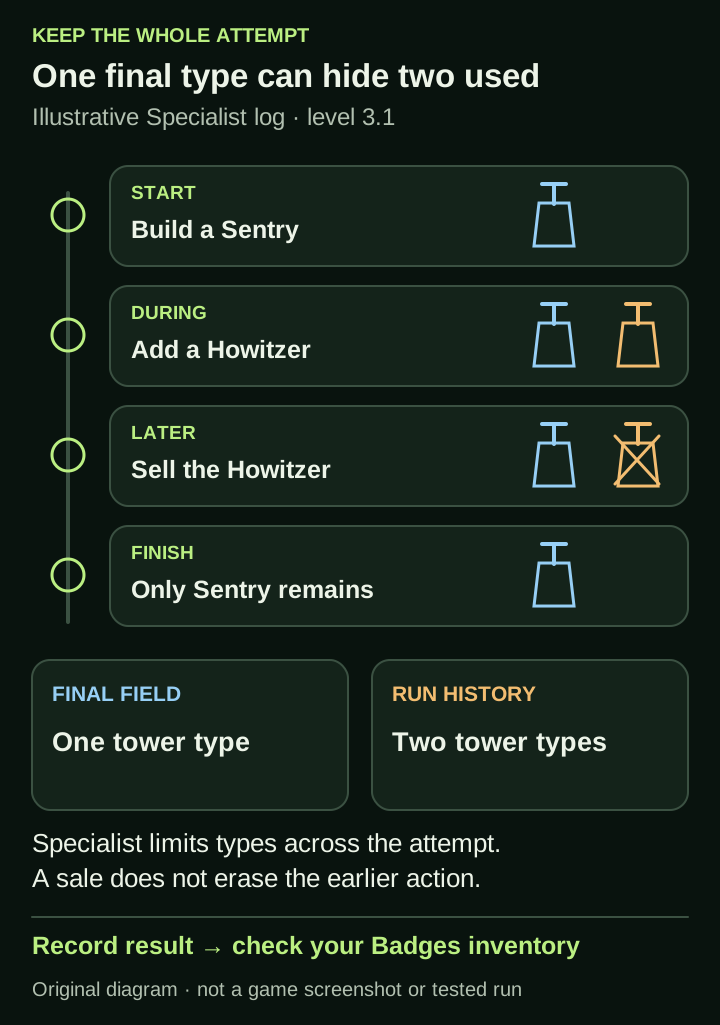
A badge run history can differ from the final field
Original explanatory diagram by Horde Defenders Wiki
Original visual explanation of the accompanying guide. Illustrative choices and symbols are not game captures, measured maps or independently tested runs.
Original source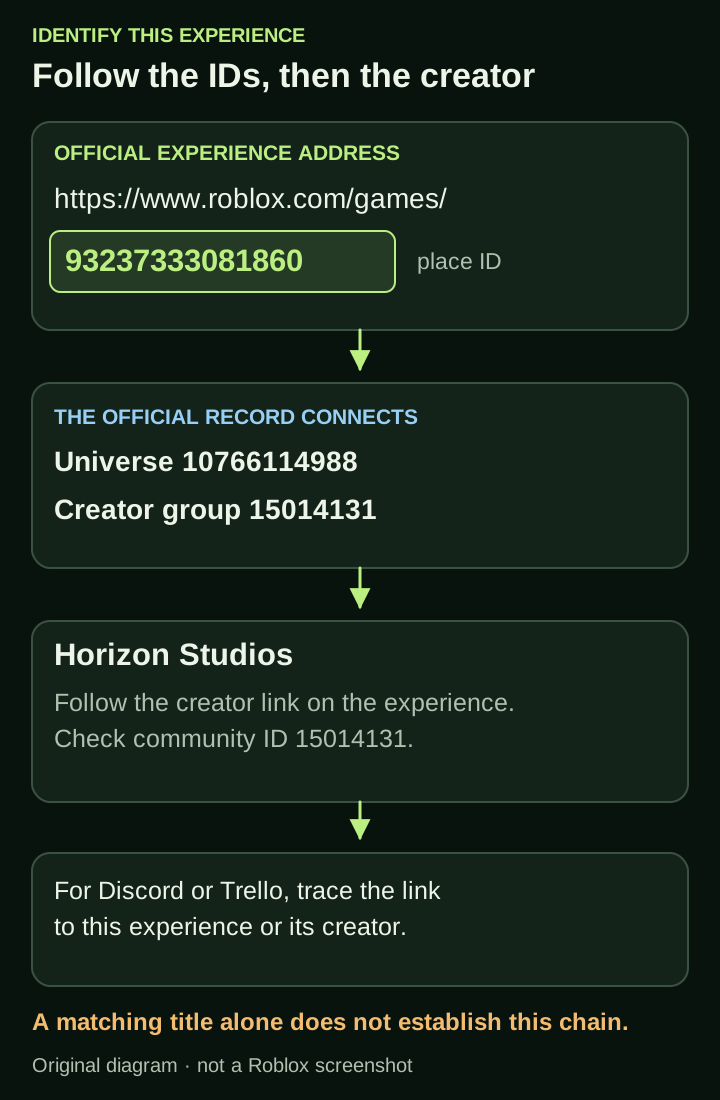
Identify the official game and follow its creator
Original explanatory diagram by Horde Defenders Wiki
Original visual explanation of the accompanying guide. Illustrative choices and symbols are not game captures, measured maps or independently tested runs.
Original source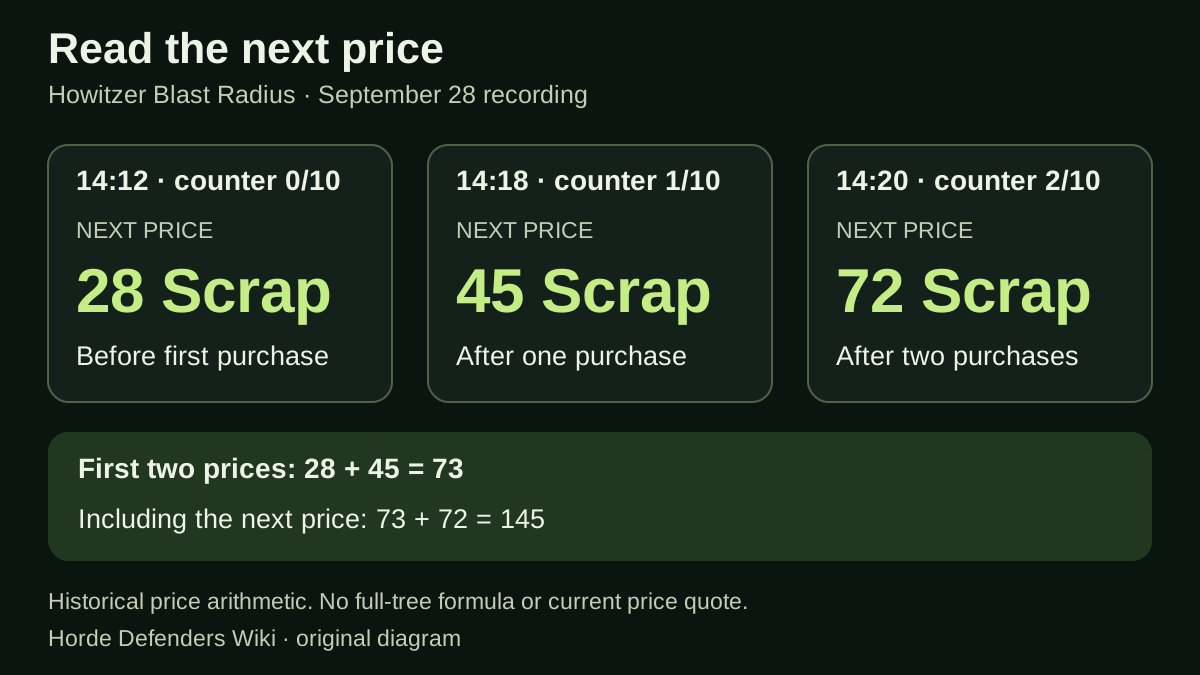
Budget from the next displayed price
Horde Defenders Wiki
Original diagram of recorded Blast Radius counters and prices, with separately labelled arithmetic. The 145 total includes a next purchase whose completion was not established; no current price or full-tree formula is asserted.
Original source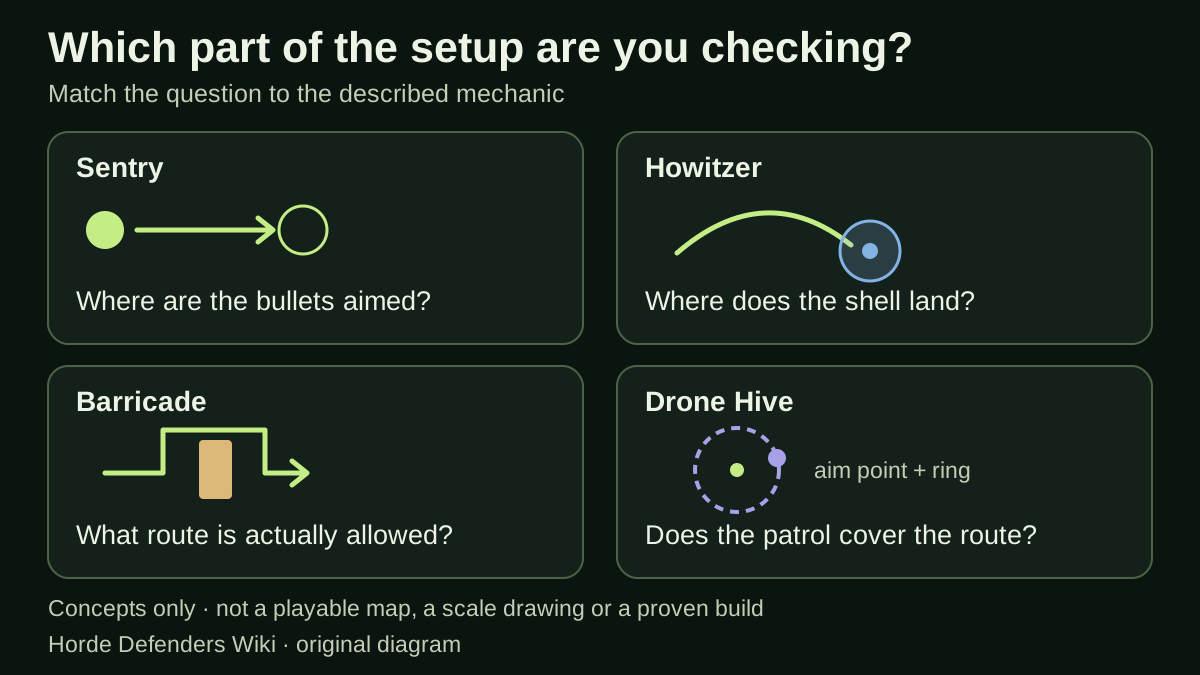
Four mechanics, four questions to inspect
Horde Defenders Wiki
Original diagram comparing historical Sentry, Howitzer and Barricade descriptions with the official Drone Hive description. Shapes are conceptual, not gameplay imagery, a scale drawing, a tested detour or a recommended combined build.
Original source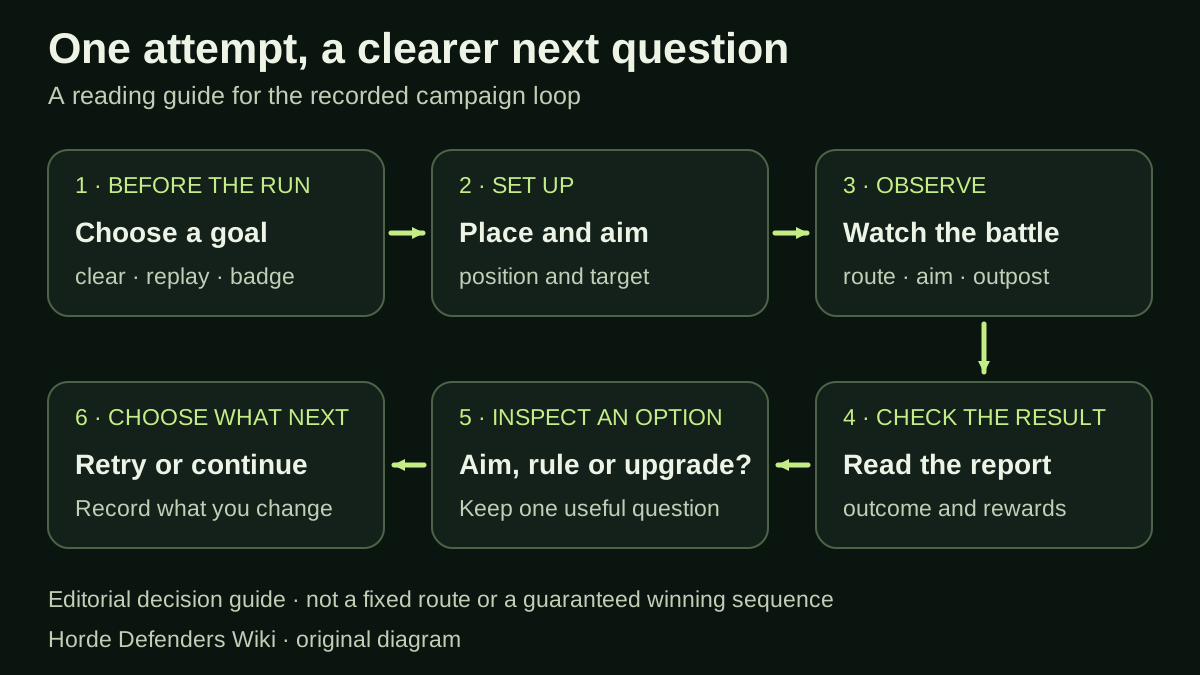
Connect an attempt to a useful next question
Horde Defenders Wiki
Original diagram organizing decisions from official gameplay descriptions and selected September 28 tutorial scenes. It is an editorial reading aid, not a fixed progression requirement, a new playtest or a screenshot.
Original source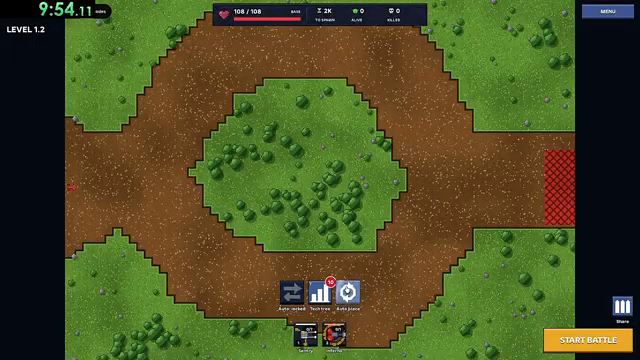
Level 1.2 before the next battle — 8:20
Video by Random Roblox Games R US; game by Horizon Studios / Roblox
Unaltered saved creator-video frame from September28,2026 recording; visually reread November11. Shows Level1.2, road around grass, and Start Battle. YouTube position differs from the green timer in the recording. Not a current-build playtest or evidence of a winning arrangement.
Original source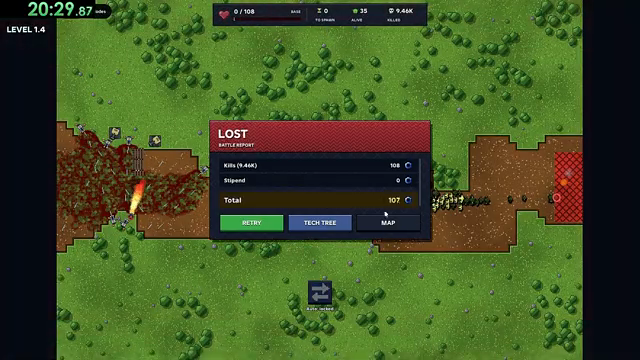
Level 1.4: the outpost is lost — 14:50
Video by Random Roblox Games R US; game by Horizon Studios / Roblox
Unaltered frame extracted November 12 from a short public-video range of the September 28, 2026 recording. Used for scene-specific commentary. YouTube position differs from the green in-recording timer. Historical evidence, not a current-build playtest.
Original source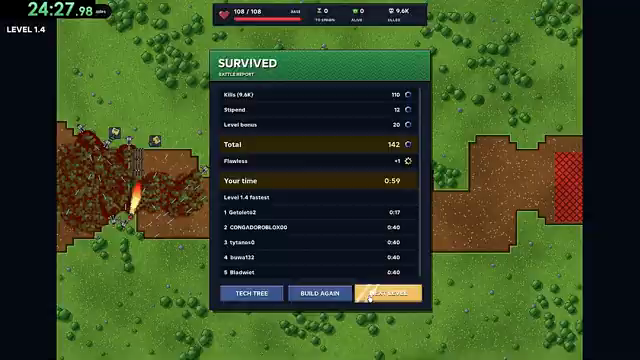
Level 1.4: full-health survival — 16:42
Video by Random Roblox Games R US; game by Horizon Studios / Roblox
Unaltered frame extracted November 12 from a short public-video range of the September 28, 2026 recording. Used for scene-specific commentary. YouTube position differs from the green in-recording timer. Historical evidence, not a current-build playtest.
Original source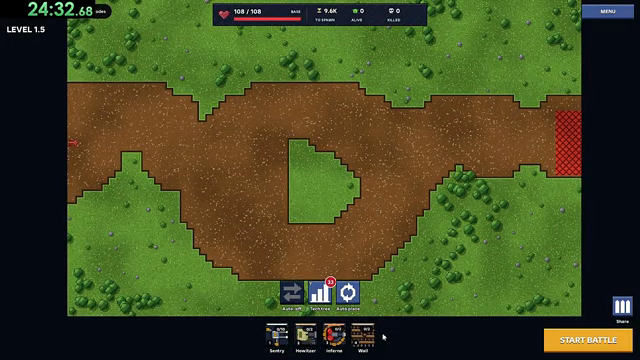
Level 1.5 before the battle — 16:46
Video by Random Roblox Games R US; game by Horizon Studios / Roblox
Unaltered frame extracted November 12 from a short public-video range of the September 28, 2026 recording. Used for scene-specific commentary. YouTube position differs from the green in-recording timer. Historical evidence, not a current-build playtest.
Original source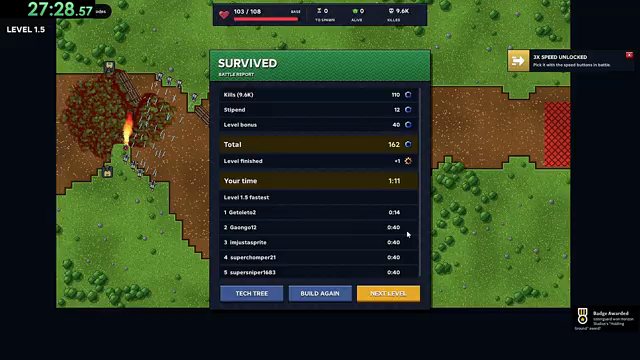
Level 1.5: damaged survival and a speed unlock — 18:18
Video by Random Roblox Games R US; game by Horizon Studios / Roblox
Unaltered frame extracted November 12 from a short public-video range of the September 28, 2026 recording. Used for scene-specific commentary. YouTube position differs from the green in-recording timer. Historical evidence, not a current-build playtest.
Original sourceGame-pass artwork
Distinct icons from the game’s official pass listings. Follow each listing for its current description and availability.





Achievement badge artwork
These images are from the official achievement badges for this Roblox experience.